
Creating and Managing Custom Objects - Overview 101
Custom objects provide a flexible and powerful way to structure and manage specialized data for your business. Whether you need to track properties, pets, legal cases, or events, custom objects enable you to organize unique information in a manner that fits your specific needs.
Step-by-Step Guide to Creating a Custom Object
Step 1: Create a Custom Object
- Navigate to Settings: Go to your account and click on the Settings menu.
- Select 'Objects': Under Settings, select Objects.
- Add Custom Object: Click on the "Add Custom Object" button.
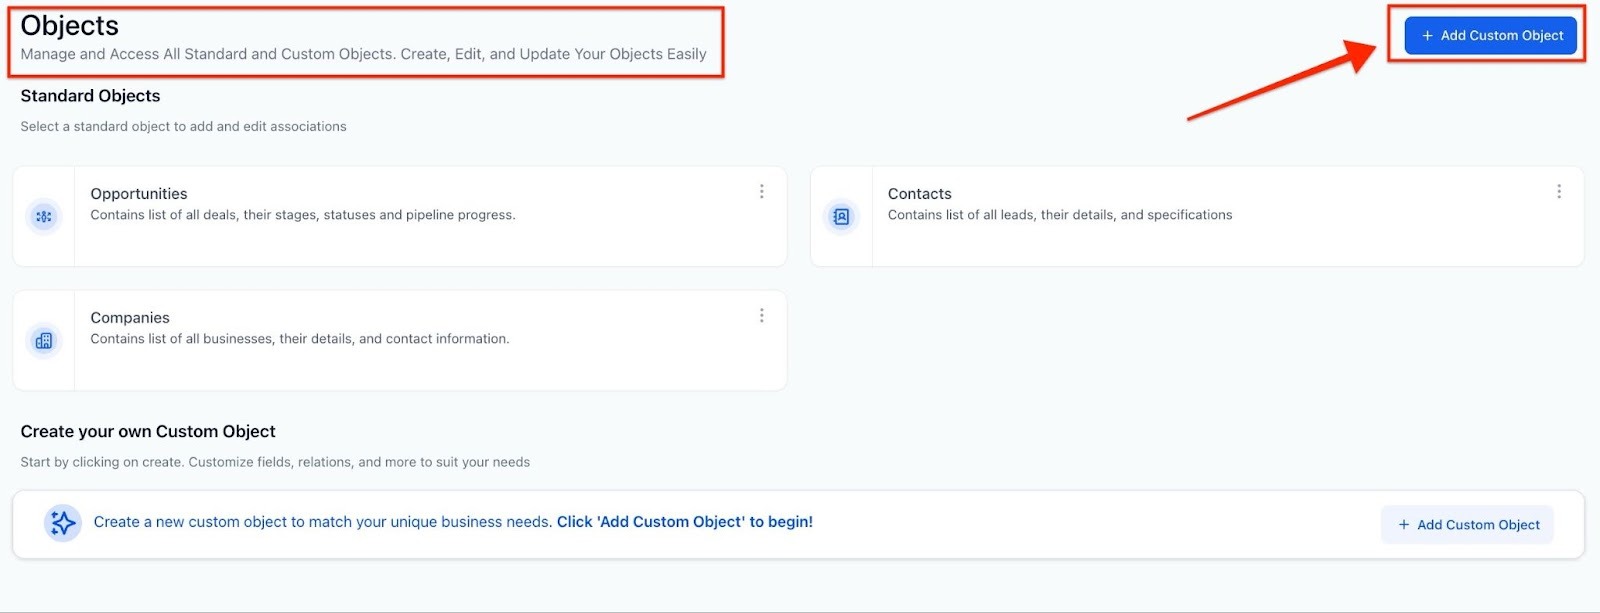
You have the ability to rename Contacts, Opportunities, and Companies to your preferred terms (e.g., Clients, Deals, Organizations).
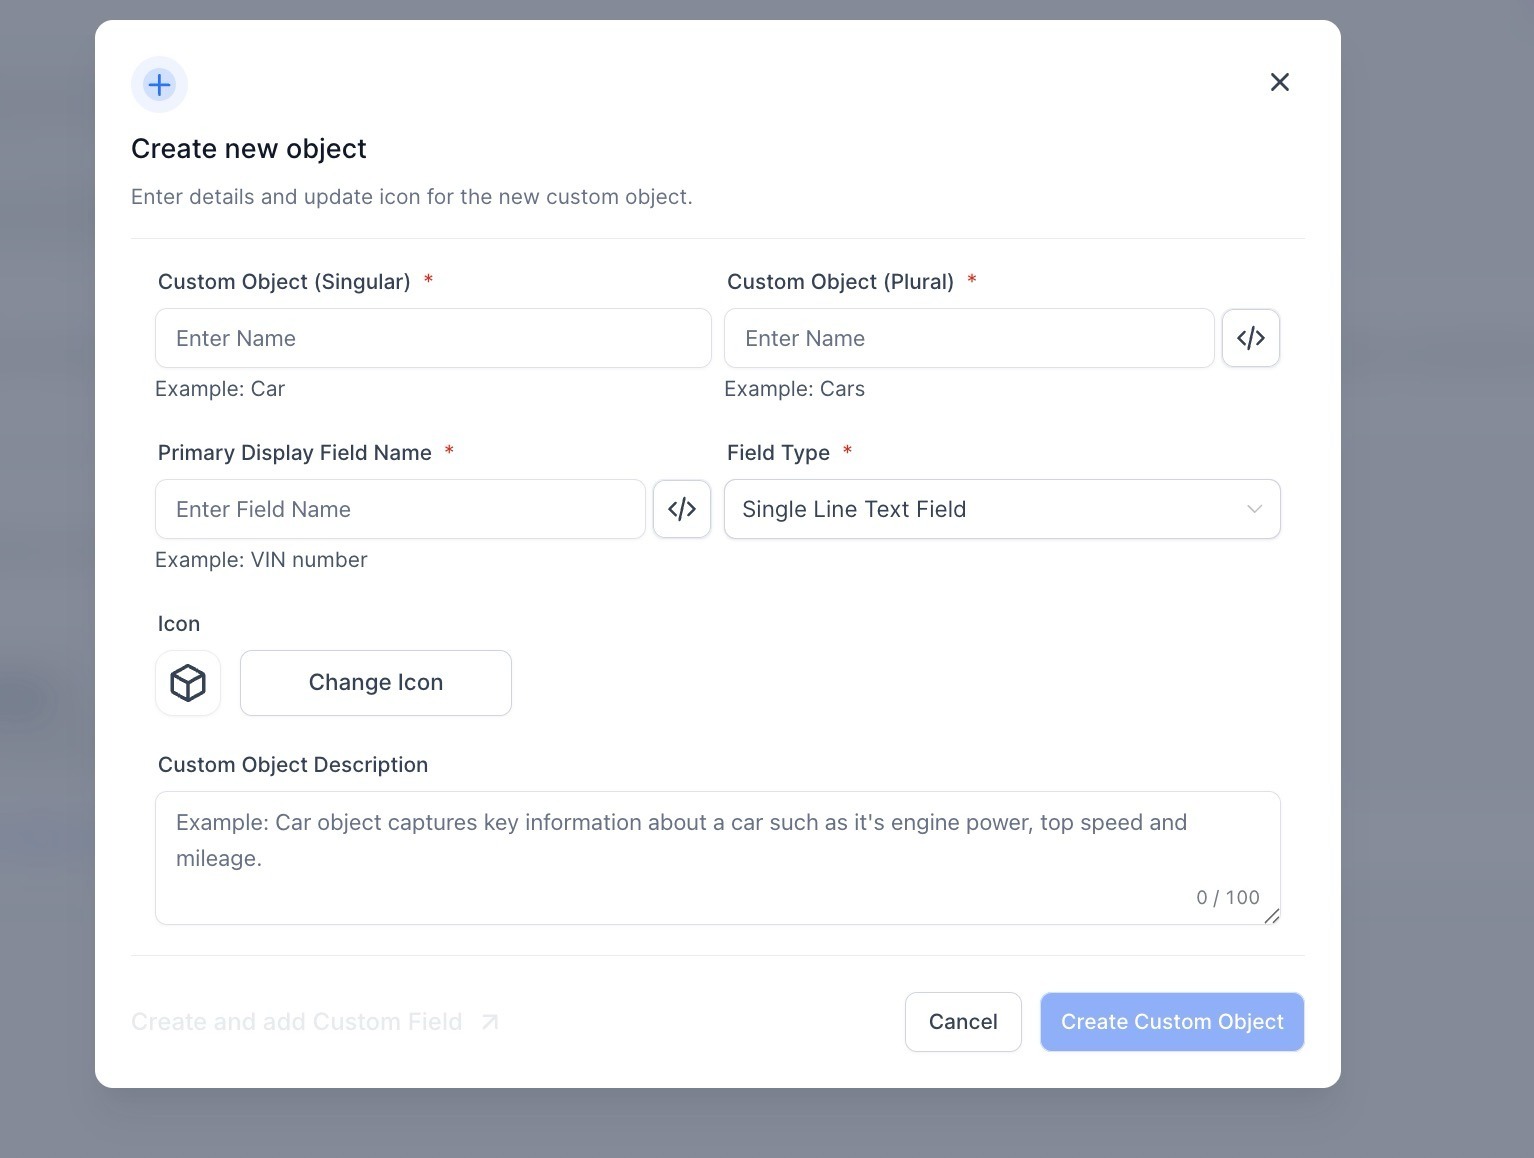
Step 2: Add Details about the Custom Object
1. Define the Object Name:
- Add a singular name for the custom object (e.g., Pet).
- Add a plural name for the custom object (e.g., Pets).
2. Internal Name:
- The system will automatically generate an internal name for the object and its primary field. This can be edited by clicking the "</>" icon.
3. Primary Display Field:
- Add a display field name to identify the object clearly (e.g., Pet Name, Pet Identification Number).
4. Add an Icon:
- Choose an icon to help easily identify the custom object.
5. Object Description:
- Add a brief description explaining what the object represents (e.g., "This object tracks details about pets in the veterinary clinic").
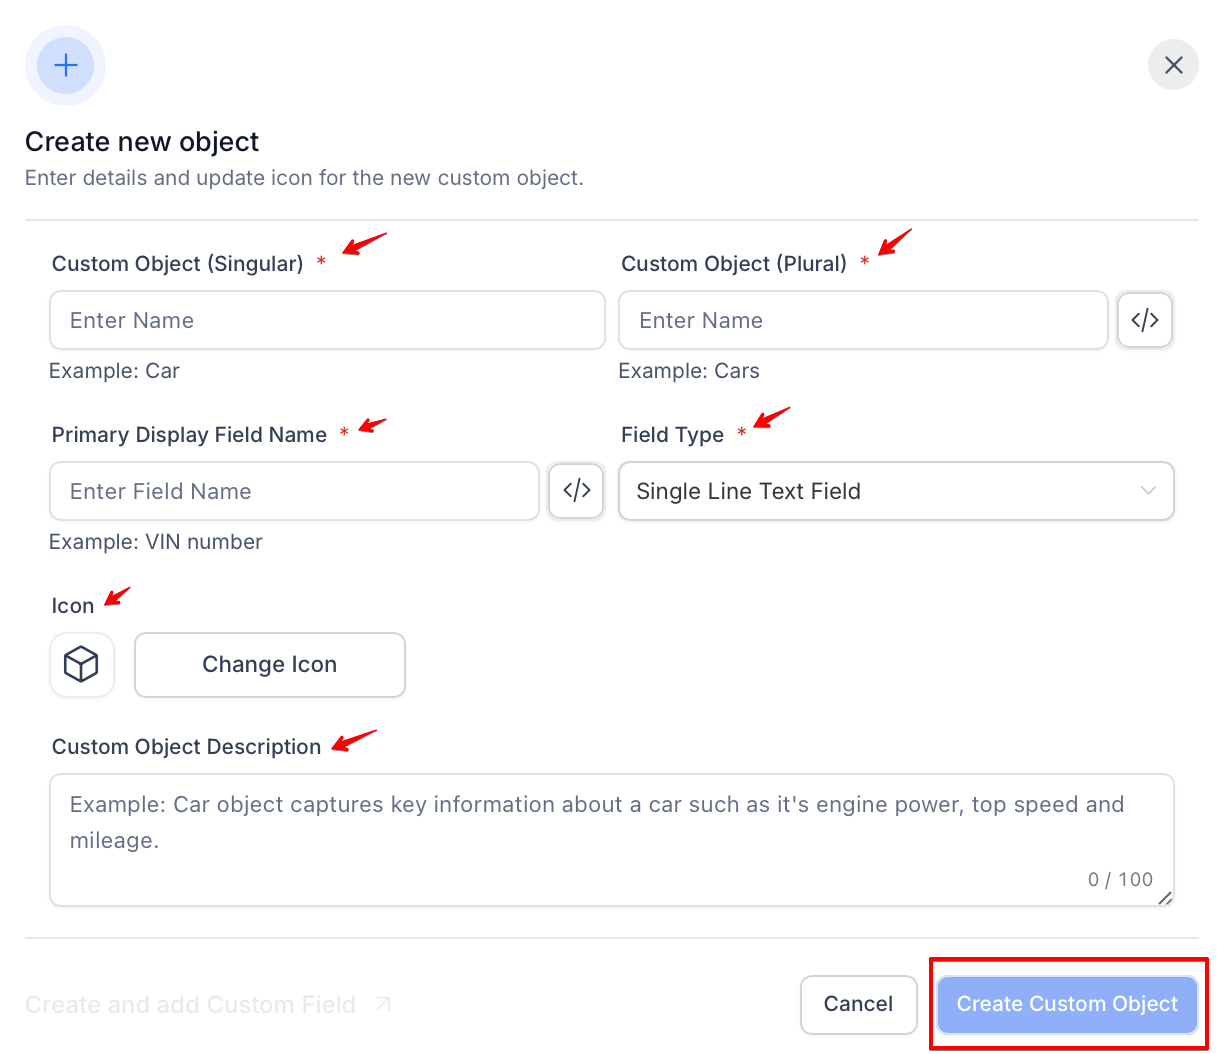
Create the Custom Object: Click on "Create Custom Object" to finalize.
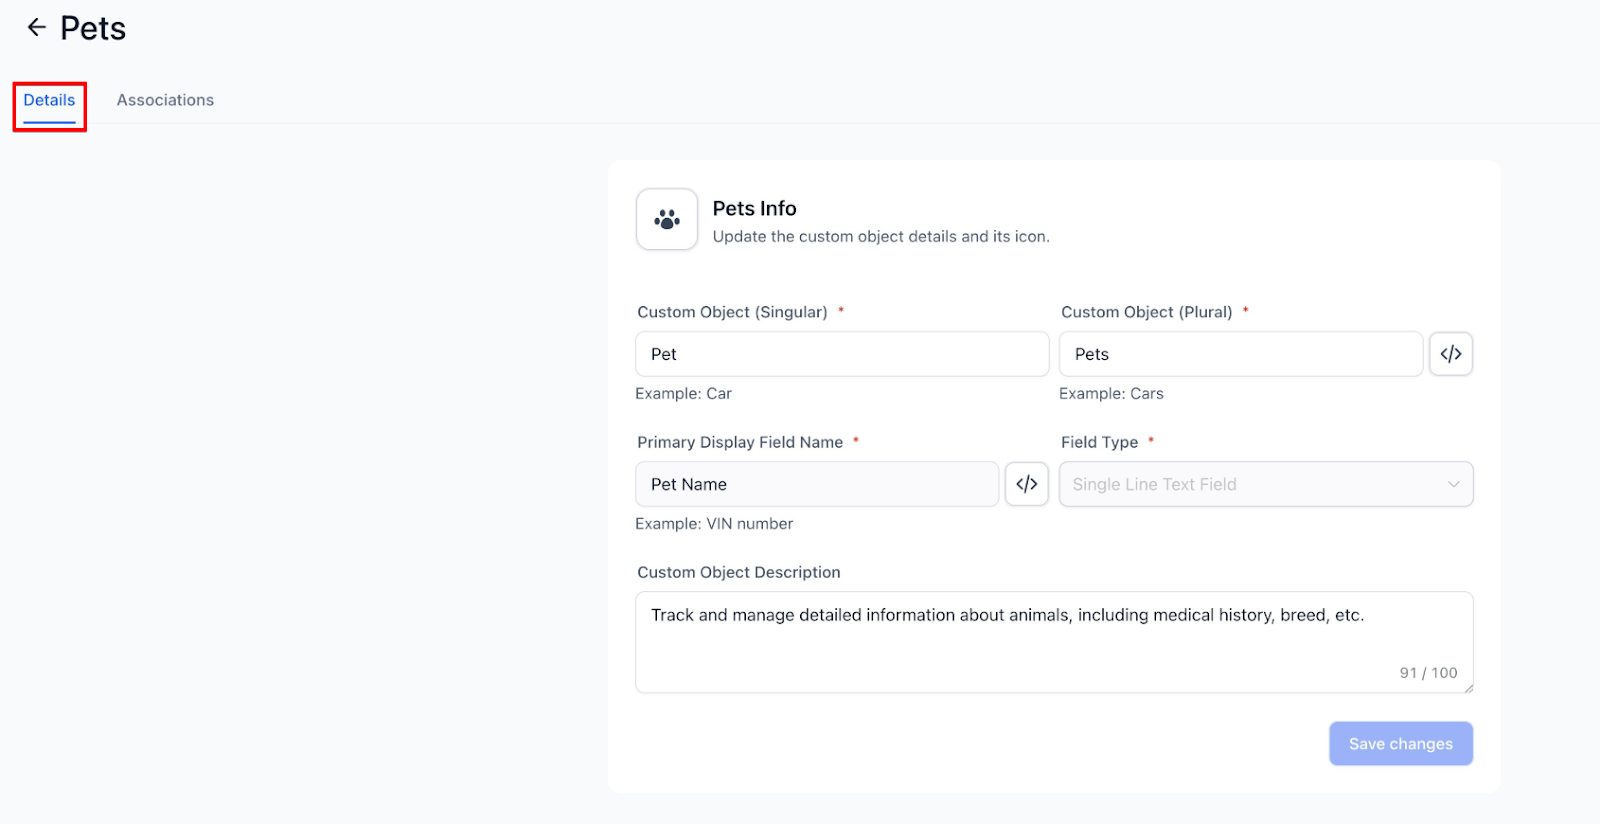
Step 3: Editing a Custom Object
FAQs
1. Who can create and edit custom objects? Only admins can create, edit, and delete custom objects. Users have read-only access.
2. Can I have more than 3 custom objects in one location? No, you are limited to a maximum of 3 custom objects per location.
3. What happens if I delete a custom object? Deleting a custom object will permanently remove it, along with all associated records, fields, and workflows.
4. Can I edit the internal name of a custom object? The internal name and primary field name cannot be edited after the object has been created.
5. What are some examples of when to use a custom object? Custom objects are ideal for tracking specialized data such as properties, pets, event attendees, or legal cases that go beyond standard objects.
6. How can I customize my SmartLists for Custom Objects? You can customize your SmartLists by selecting filters, sorting options, and columns. This allows you to tailor the views to display the most relevant and up-to-date information for your team.
7. Can I share SmartLists with my team?Yes, you can share your SmartLists with team members by providing direct links. You can set permissions for each user, allowing either view-only access or editing rights.
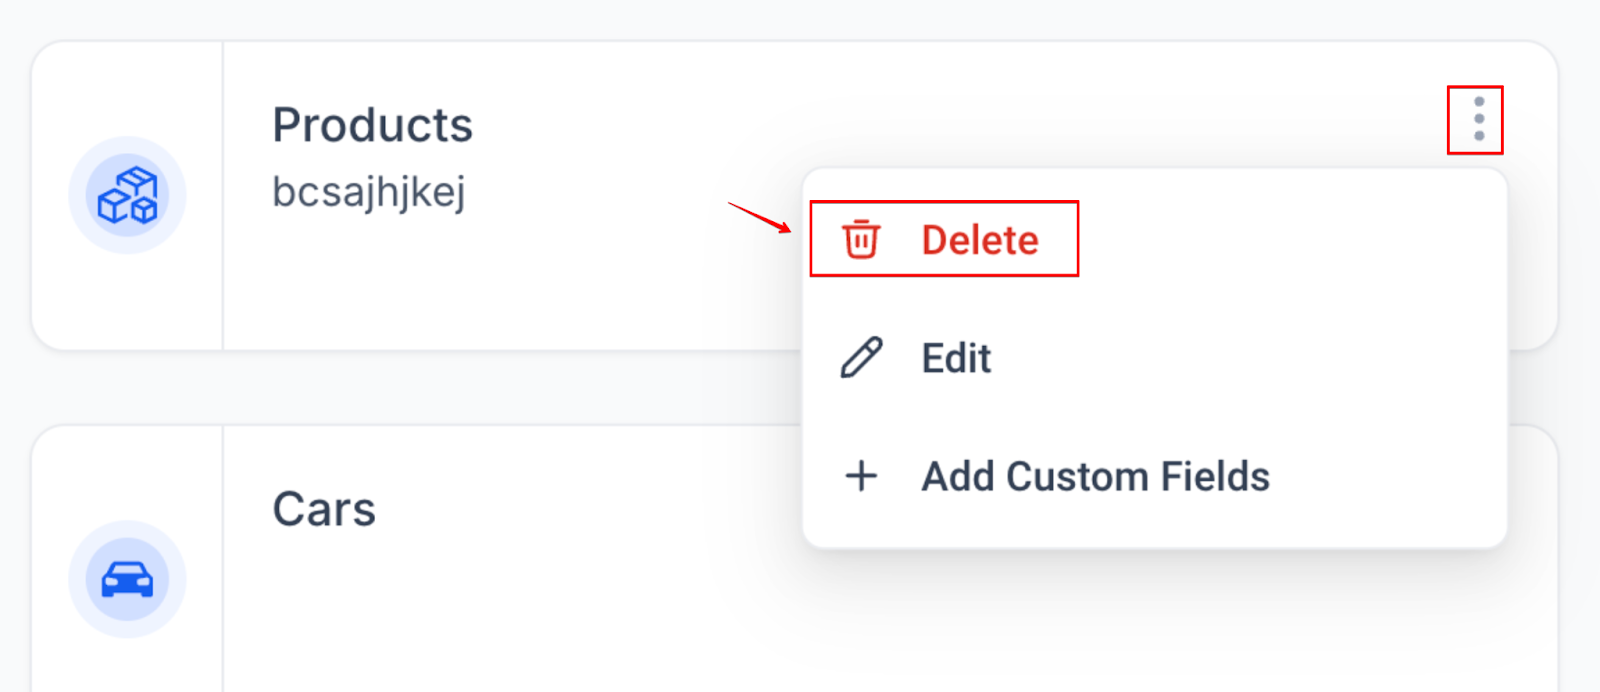
Deleting a Custom Object
- Access the Object: Click on the 3 dots next to the custom object name.
- Select 'Delete': Choose "Delete" from the dropdown menu.
- Confirm Deletion: Type "DELETE" in the confirmation box and click Confirm.
Once created, the custom object will appear on the same page.
Click on the object to open it for editing.
Important Note: The primary display field and internal names cannot be edited once created.
Objects are instantly updated across the entire platform, including navigation menus, filters, reports, and dashboards.
Deleting a Custom Object
Access the Object: Click on the 3 dots next to the custom object name.
Select 'Delete': Choose "Delete" from the dropdown menu.
Confirm Deletion: Type "DELETE" in the confirmation box and click Confirm.
Important Warning
Deleting a custom object is irreversible. All records, associations, workflows, and custom fields related to the custom object will be permanently removed and cannot be recovered.
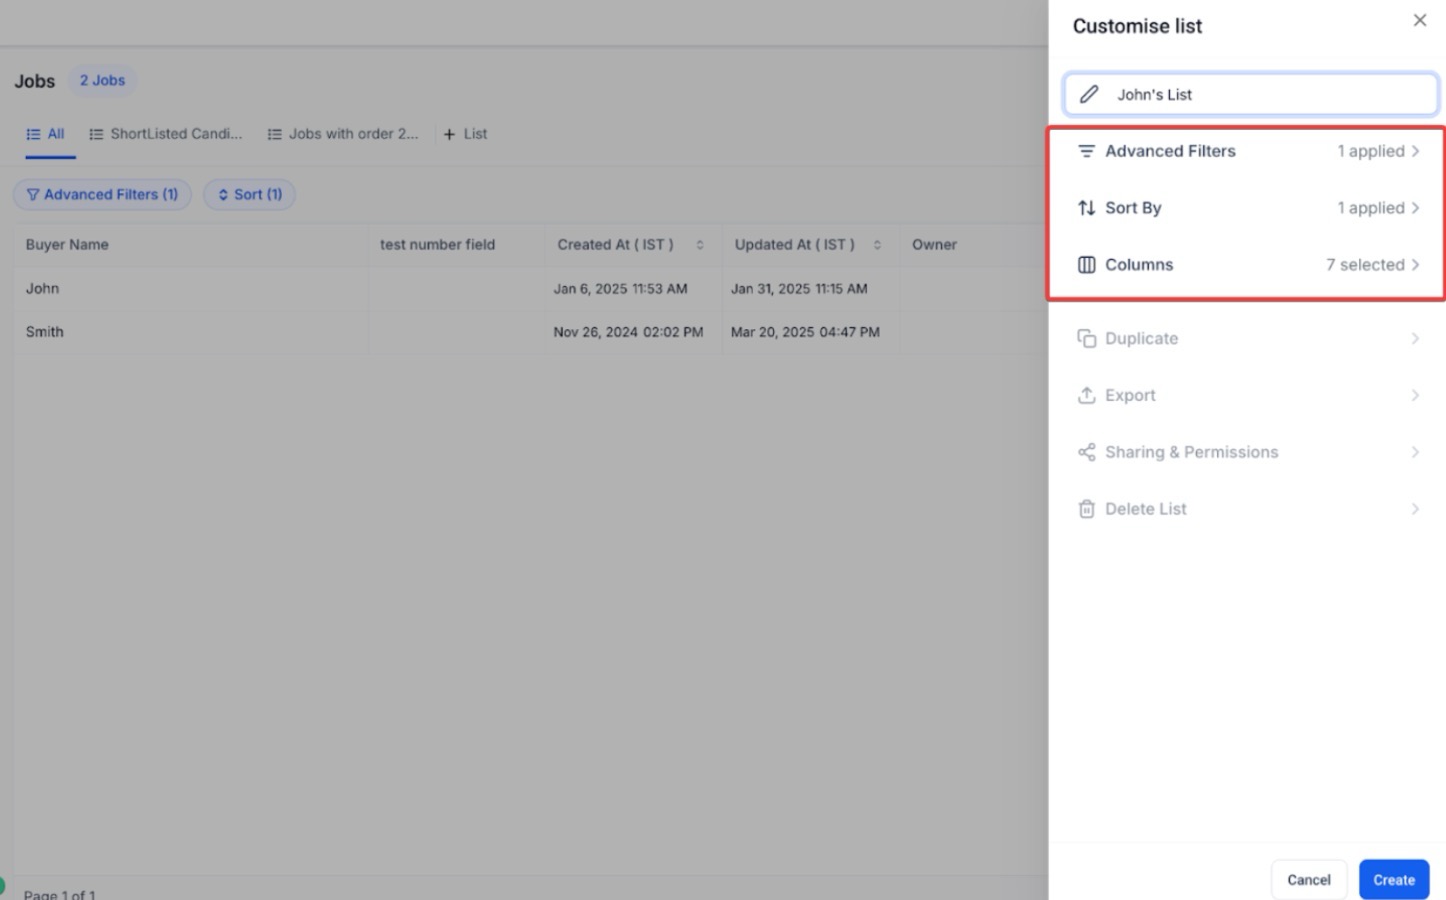
SmartLists for Custom Objects
Easily create, manage, and share personalized views with Smart lists. This simplifies the management of Custom Objects by offering flexible, shareable views that ensure everyone sees the most relevant and up-to-date information.
- Customize SmartLists by selecting filters, sorting options, and columns.
- Use instant search and navigation to quickly switch between different SmartLists.
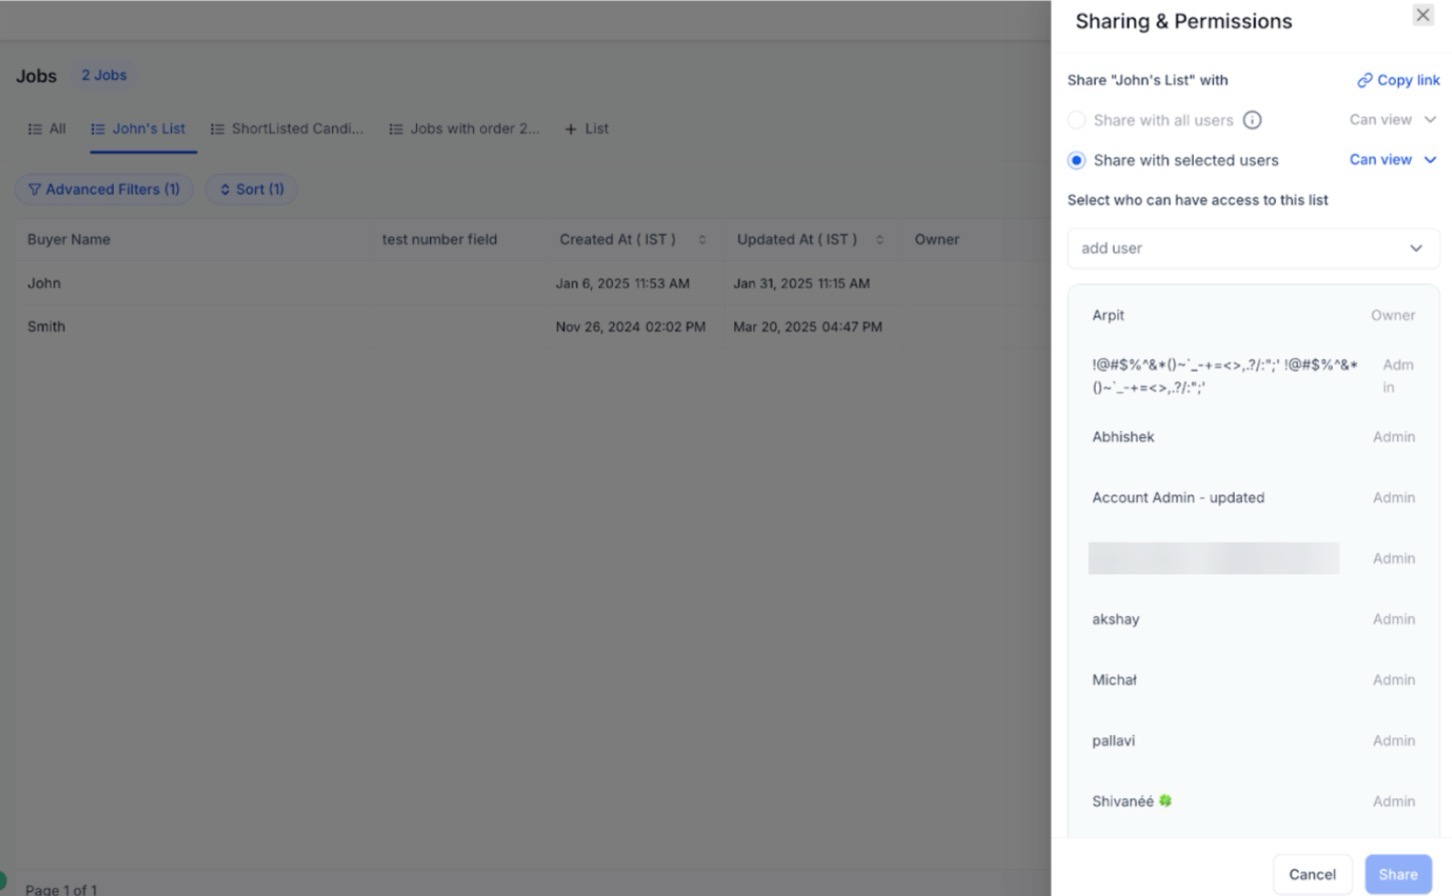
- Share your SmartLists with team members, setting permissions for view-only or editing access.
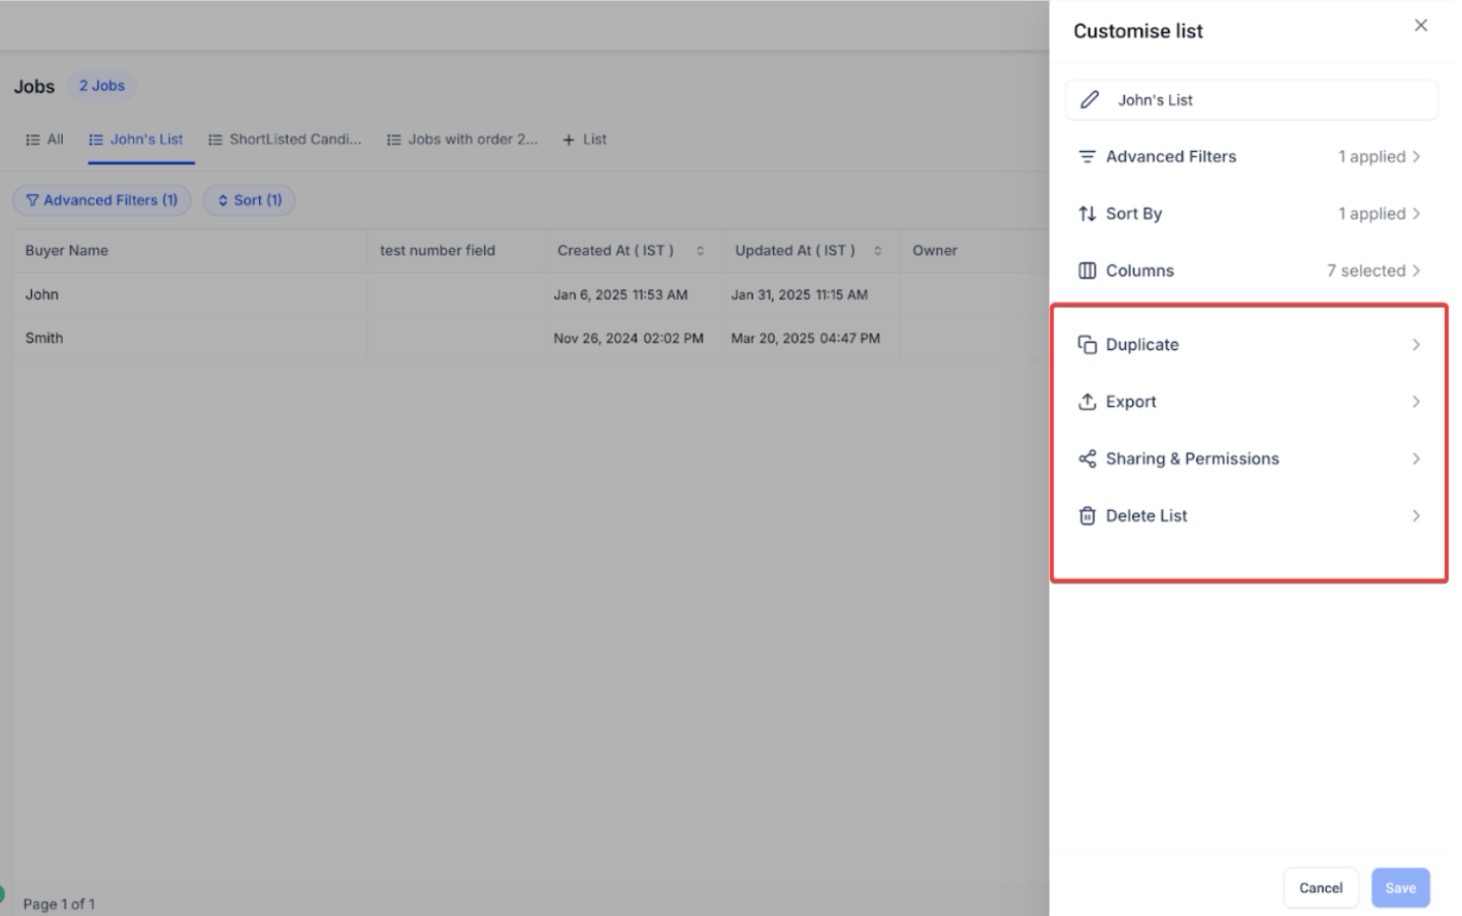
- Admins can manage SmartLists, duplicate, rename, export, or delete them as needed.
FAQs
1. Who can create and edit custom objects?
Only admins can create, edit, and delete custom objects. Users have read-only access.
2. Can I have more than 3 custom objects in one location?
No, you are limited to a maximum of 3 custom objects per location.
3. What happens if I delete a custom object?
Deleting a custom object will permanently remove it, along with all associated records, fields, and workflows.
4. Can I edit the internal name of a custom object?
The internal name and primary field name cannot be edited after the object has been created.
5. What are some examples of when to use a custom object?
Custom objects are ideal for tracking specialized data such as properties, pets, event attendees, or legal cases that go beyond standard objects.
6. How can I customize my SmartLists for Custom Objects?
You can customize your SmartLists by selecting filters, sorting options, and columns. This allows you to tailor the views to display the most relevant and up-to-date information for your team.
7. Can I share SmartLists with my team?
Yes, you can share your SmartLists with team members by providing direct links. You can set permissions for each user, allowing either view-only access or editing rights.